About Me

- SNC
- Hi I am very laid back and easy to get along with! I am 41 years old and I have 1wonderful girl. I have been psping for over 4 years now and I'm up to learning new things. Be on the look out for lots of new stuff!
My Favs!


Showing posts with label Grunge N Glitter. Show all posts
Showing posts with label Grunge N Glitter. Show all posts
Thursday, February 13, 2014
 Deadly Cute

by Sebrina on
July 18th, 2010
Any resemblance to another
tutorial is purely coincidental.
Do not copy this tutorial and post it through any group or claim it as your own.
For this Tutorial I'm using
The art of Rachael Huntington.
I can't find where she is selling so if you know please let me know so I can link her! Thanks!
Please do not use the same tube(s) unless you have the appropriate license to do so.
Template #289 By Missy @ Divine Intentionz. Thanks so much! Here
Scrap kit Moonlight Sonata - by Grunge and Glitter.Thank you so much! Go Here To Purchase
Optional Plugins Gradient Glow.
This tutorial assumes you have a working knowledge of PSP.
Lets get started
Open your template
Ctrl+D to duplicate
Delete the copyright layer.
On Rectangle1 Layer Select all float and defloat and copy and paste paper 12 on new layer then select invert and tap delete key. Unselect and delete original layer.
On Thin Rectangle Layer Select all float and defloat and copy and paste paper 6 on new layer then select invert and tap delete key. Unselect and delete original layer.
On Circle Layer Select all float and defloat and copy and paste paper 7 on new layer then select invert and tap delete key. Unselect and delete original layer.
On Rectangle2 Layer Select all float and defloat and copy and paste paper 5 on new layer then select invert and tap delete key. Unselect and delete original layer.
On Small Circle Layer Select all float and defloat and copy and paste paper 2 on new layer then select invert and tap delete key. Unselect and delete original layer.
On Glittered Circle Edge Layer Select all float and defloat add new raster layer flood hill white and add noise of choice. Unselect and delete original layer.
On Thin Rectangle 2 Layer Select all float and defloat and copy and paste paper 3 on new layer then select invert and tap delete key. Unselect and delete original layer.
On Word Art Layer take it off the tag (cut) and paste it as a new layer.... grey scale it out then go to colorize and color it blue or whatever color you are using to match your tag. Then paste back on to tag in the same spot.
Now you can use elements of choice or you can use the ones I did. Please use my tag as a reference!
Dahlia 1 & 2 resize 50% place around frame duplicate Dahlia 2 (for your 3 flowers around frame)
Moon resize 50% place at top left
Moon light Mirror free rotate 30 to the left then place to make it look like it is coming from the moon
Floral Vine .. place at the bottom left of tag
Butterfly 1 resize 25% place at bottom left on top of vine
Black Cat resize 40% place behind word art layer.
Now add a drop shadow to all layers
*****Optional for your tube******
I was turned on to this trick by a good friend of my named Kim. You can check her out Click Here See Kim!
On your tube if you want to make it kinda pop out a little more here is something you can do.
Duplicate your tube layer on the copy layer add a gaussian blur of 2.00 and move it below the original layer. On the original layer blend mode to hard light and change the opacity to 73. Merge the layer down and sharpen!
Crop/resize tag to your preference - add copyright/license & watermark & name ..Save as PNG or JPEG
Please leave me a comment to let me know how you liked my tutorial. And please send me your results and I will post them up! I would love to see your results! My E-mail is Timeofyourlifescraps@yahoo.com
 Labels:
Grunge N Glitter
|
Labels:
Grunge N Glitter
|
Pride

by Sebrina on
July 18th, 2010
Any resemblance to another
tutorial is purely coincidental.
Do not copy this tutorial and post it through any group or claim it as your own.
For this Tutorial I'm using
The art of Jennifer Janesko.
You can purchase her artwork at
CDO
Please do not use the same tube(s) unless you have the appropriate license to do so.
Template #1 By Mythical Designs. Thanks so much! Here
Scrap kit Deadly Sins Pride - by Grunge and Glitter.Thank you so much! Go Here To Purchase
Optional Plugins Gradient Glow.
This tutorial assumes you have a working knowledge of PSP.
Lets get started
Open your template
Ctrl+D to duplicate
Delete the copyright layer.
On Rectangle Layer Select all float and defloat and copy and paste paper 2 on new layer then select invert and tap delete key. Unselect and delete original layer. Add Gradient Glow Medium Black
On Top Circle Layer Select all float and defloat and copy and paste paper 11 on new layer then select invert and tap delete key. Unselect and delete original layer.
On Bottom Circle Layer Select all float and defloat and copy and paste paper 8 on new layer then select invert and tap delete key. Unselect and delete original layer.
On Circle Layer Select all float and defloat and copy and paste paper 1 on new layer then select invert and tap delete key. Unselect and delete original layer.
On Dots Layer Select all float and defloat and copy and paste paper 7 on new layer then select invert and tap delete key. Unselect and delete original layer. Add Noise of choice.
On I Know word art Layer Select all float and defloat and copy and paste paper 3 on new layer then select invert and tap delete key. Unselect and delete original layer. Add Inner Bevel and Gradient Glow Medium Black
On I Look Good word art Layer Select all float and defloat and copy and paste paper 6 on new layer then select invert and tap delete key. Unselect and delete original layer. Add Inner Bevel and Gradient Glow Medium Black
Now you can use elements of choice or you can use the ones I did. Please use my tag as a reference!
Vanity resize 2 times 50% add medium gradient glow white place above word art
Cross resize 90% place in upper right of tag
Pucked Ribbon1 resize 50% place on top of rectangle layer
Doodle 1 resize 85% place behind tag
Doodle 2 resize 85% place behind tag
Element 2 resize 50% place on top of circle layer
Bottle 2 resize 75% place on top of word art layer
Now add a drop shadow to all layers
*****Optional for your tube******
I was turned on to this trick by a good friend of my named Kim. You can check her out Click Here See Kim!
On your tube if you want to make it kinda pop out a little more here is something you can do.
Duplicate your tube layer on the copy layer add a gaussian blur of 2.00 and move it below the original layer. On the original layer blend mode to hard light and change the opacity to 73. Merge the layer down and sharpen!
Crop/resize tag to your preference - add copyright/license & watermark & name ..Save as PNG or JPEG
Please leave me a comment to let me know how you liked my tutorial. And plese send me your results and I will post them up! I would love to see your results! My E-mail is Timeofyourlifescraps@yahoo.com
Labels:
Grunge N Glitter
|
Bad Influence

by Sebrina on
July 18th, 2010
Any resemblance to another
tutorial is purely coincidental.
Do not copy this tutorial and post it through any group or claim it as your own.
For this Tutorial I'm using
The art of Jamie Kidd.
You can purchase his artwork at
CDO
Please do not use the same tube(s) unless you have the appropriate license to do so.
Template #53 By Deb. Thanks so much! Here
Scrap kit Teenage Dirt Bag - by Grunge and Glitter.Thank you so much! Go Here To Purchase
Font of choice or the one I have used is Apple Butter.
Optional Plugins Gradient Glow.
This tutorial assumes you have a working knowledge of PSP.
Lets get started
Open your template
Ctrl+D to duplicate
Delete the copyright layer.
Delete Raster 8
On Raster 4 Layer Select all float and defloat and copy and paste paper 7 on new layer then select invert and tap delete key. Unselect and delete original layer.
On Raster 4 Copy Layer Select all float and defloat and copy and paste paper 2 on new layer then select invert and tap delete key. Unselect and delete original layer.
On Raster 3 Layer Select all float and defloat and copy and paste paper 3 on new layer then select invert and tap delete key. Unselect and delete original layer.
On Raster 3 Copy Layer Select all float and defloat and copy and paste paper 9 on new layer then select invert and tap delete key. Unselect and delete original layer.
On Raster 2 Layer Select all float and defloat and copy and paste paper 10 on new layer then select invert and tap delete key. Unselect and delete original layer.
On Copy of Vector 1 Layer Select all float and defloat and copy and paste paper 11 on new layer then select invert and tap delete key. Unselect and delete original layer.
On Raster 7 Layer Add Gradient Glow Fat White.
Add Close up of tube of choice to the circle change the blend mode to Luminance Legacy.
Now you can use elements of choice or you can use the ones I did. Please use my tag as a reference!
Glitter Splat1 Mirror upsize by 150% place behind tag.
Glitter Splat2 upsize by 150% place behind tag.
Motorcycle resize 50% place to the left of tag make it look like it is setting on the rectangle just behind word art.
Flair resize 50% 2 times and move to the top left of tag
Flower2 resize 50% and move to the bottom right of tag
Skull 1 and Skull 2 resize 25% and place one on each side of the word art layer.
Now add a drop shadow to all layers
*****Optional for your tube******
I was turned on to this trick by a good friend of my named Kim. You can check her out Click Here See Kim!
On your tube if you want to make it kinda pop out a little more here is something you can do.
Duplicate your tube layer on the copy layer add a gaussian blur of 2.00 and move it below the original layer. On the original layer blend mode to hard light and change the opacity to 73. Merge the layer down and sharpen!
Crop/resize tag to your preference - add copyright/license & watermark & name ..Save as PNG or JPEG
Please leave me a comment to let me know how you liked my tutorial. And plese send me your results and I will post them up! I would love to see your results! My E-mail is Timeofyourlifescraps@yahoo.com
Labels:
Grunge N Glitter
|
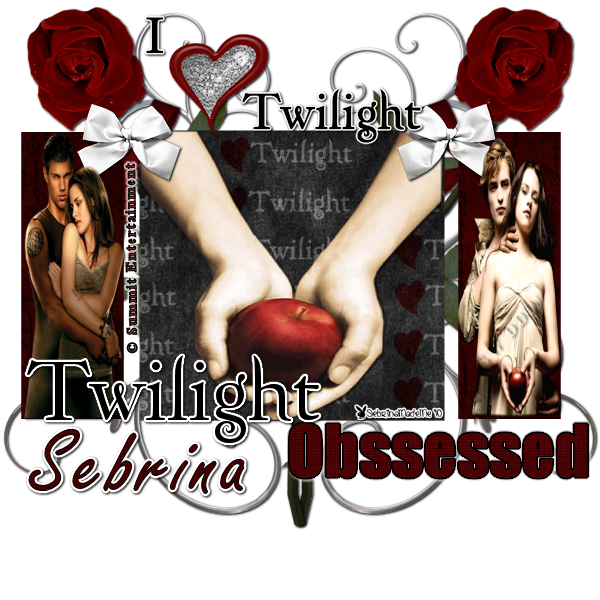
Heart Twilight
by Sebrina on
July 12th, 2010
Any resemblance to another
tutorial is purely coincidental.
Do not copy this tutorial and post it through any group or claim it as your own.
For this Tutorial I'm using
The art of Summit Entertainment.
Template #Twilight Template 1 By Yvette @ Essence Of Creativity. Thanks so much! Here
Scrap kit I Heart Twilight - by Grunge and Glitter.Thank you so much! Go Here To Purchase
Optional Plugins Gradient Glow.
This tutorial assumes you have a working knowledge of PSP.
Lets get started
Open your template
Ctrl+D to duplicate
Delete the copyright layer.
Delete The Dots
Increase Canvas Size to 600 x 600.
On Square Layer Select all float and defloat and copy and paste paper 1 on new layer then select invert and tap delete key. Unselect and delete original layer.
On Rectangles Layer Select all float and defloat and copy and paste paper 11 on new layer then select invert and tap delete key. Unselect and delete original layer.
On Obsessed Layer Select all float and defloat and copy and paste paper 6 on new layer then select invert and tap delete key. Unselect and delete original layer. Add Gradient Glow Medium Black
On Twilight Layer Select all float and defloat and add new layer flood fill with black. Unselect and delete original layer. Add Gradient Glow Medium White.
Now you can use elements of choice or you can use the ones I did. Please use my tag as a reference!
Doodle place behind tag move to far left duplicate then mirror
Rose place above doodle layer move to far left duplicate then mirror
Bow1 resize 50% 2 times place between the rectangles and the square
Word Art5 resize 50% place at the top of tag.
Now add a drop shadow to all layers
*****Optional for your tube******
I was turned on to this trick by a good friend of my named Kim. You can check her out Click Here See Kim!
On your tube if you want to make it kinda pop out a little more here is something you can do.
Duplicate your tube layer on the copy layer add a gaussian blur of 2.00 and move it below the original layer. On the original layer blend mode to hard light and change the opacity to 73. Merge the layer down and sharpen!
Crop/resize tag to your preference - add copyright/license & watermark & name ..Save as PNG or JPEG
Please leave me a comment to let me know how you liked my tutorial. And plese send me your results and I will post them up! I would love to see your results! My E-mail is Timeofyourlifescraps@yahoo.com
Labels:
Grunge N Glitter
|
Wild

by Sebrina on
July 12th, 2010
Any resemblance to another
tutorial is purely coincidental.
Do not copy this tutorial and post it through any group or claim it as your own.
For this Tutorial I'm using
The art of Jamie Kidd.
You can purchase his artwork at
CDO
Please do not use the same tube(s) unless you have the appropriate license to do so.
Template #8 By Tami @ Addictive Pleasures. Thanks so much! Here
Scrap kit Video Killed The Radio Star - by Brandi @ Grunge and Glitter.Thank you so much! Freebie Here
Optional Plugins Gradient Glow.
This tutorial assumes you have a working knowledge of PSP.
Lets get started
Open your template
Ctrl+D to duplicate
Delete the copyright layer.
Delete Thin Strip Rectangle and Thin Strip 2
On Rectangle 1 Layer Select all float and defloat and copy and paste paper 6 on new layer then select invert and tap delete key. Unselect and delete original layer.
On Rectangle 2 Layer Select all float and defloat and copy and paste paper 6 on new layer then select invert and tap delete key. Unselect and delete original layer.
On Thin Rectangle Layer Select all float and defloat and copy and paste paper 5 on new layer then select invert and tap delete key. Unselect and delete original layer.
On Rectangle 2 Layer Select all float and defloat and copy and paste paper 5 on new layer then select invert and tap delete key. Unselect and delete original layer.
On Circle Layer Select all float and defloat and copy and paste paper 2 on new layer then select invert and tap delete key. Unselect and delete original layer.
On Small Circle Layer Select all float and defloat and copy and paste paper 8 on new layer then select invert and tap delete key. Unselect and delete original layer.
On Wild Layer Select all float and defloat and copy and paste paper 11 on new layer then select invert and tap delete key. Unselect and delete original layer. Add Gradient Glow Medium pink
On ONE Layer Select all float and defloat and copy and add new layer flood fill with Neon Green add Gradient Glow Of Blue. Unselect and delete original layer.
On Really Layer Select all float and defloat and copy and add new layer flood fill with Blue add Gradient Glow Of Yellow. Unselect and delete original layer.
Place a close up of your tube change blend mode to Luminance Legacy and lower the opacity to 60.
Now you can use elements of choice or you can use the ones I did. Please use my tag as a reference!
Silhouette1 resize 50% place lower left
Lips resize 35% rotate 20 to the left place top left
Disco ball resize 50% place behind tube top right
Sunglasses resize 25% place over eyes erase parts hanging over make it look like she is wearing them
Bracelet resize 70% make it look like it is hanging from one side to the other.
Now add a drop shadow to all layers
*****Optional for your tube******
I was turned on to this trick by a good friend of my named Kim. You can check her out Click Here See Kim!
On your tube if you want to make it kinda pop out a little more here is something you can do.
Duplicate your tube layer on the copy layer add a gaussian blur of 2.00 and move it below the original layer. On the original layer blend mode to hard light and change the opacity to 73. Merge the layer down and sharpen!
Crop/resize tag to your preference - add copyright/license & watermark & name ..Save as PNG or JPEG
Please leave me a comment to let me know how you liked my tutorial. And plese send me your results and I will post them up! I would love to see your results! My E-mail is Timeofyourlifescraps@yahoo.com
Check Me Out

by Sebrina on
July 12th, 2010
Any resemblance to another
tutorial is purely coincidental.
Do not copy this tutorial and post it through any group or claim it as your own.
For this Tutorial I'm using
The art of Gennodify Koufay.
I can't find where he is selling his tubes if you know please let me know! Thanks
Please do not use the same tube(s) unless you have the appropriate license to do so.
Template #63 By Tami @ Addictive Templates. Thanks so much! Here
Scrap kit Deadly Sin Collections Gluttony - by Brandi @ Grunge and Glitter.Thank you so much! Go Here To Purchase
Font of choice or the one I have used is Buffet Script.
Optional Plugins Gradient Glow.
This tutorial assumes you have a working knowledge of PSP.
Lets get started
Open your template
Ctrl+D to duplicate
Delete the copyright layer.
Increase Canvas Size to 750 x 700.
On Raster Layer 6 Select all float and defloat and copy and paste paper 12 on new layer then select invert and tap delete key. Unselect and delete original layer.
On Raster Layer 10 Select all float and defloat and copy and paste paper 1 on new layer then select invert and tap delete key. Unselect and delete original layer.
On Raster Layer 2 Select all float and defloat and copy and paste paper 4 on new layer then select invert and tap delete key. Unselect and delete original layer.
On Raster Layer 4 Select all float and defloat and copy and paste paper 8 on new layer then select invert and tap delete key. Unselect and delete original layer.
On Raster Layer 7 Select all float and defloat and copy and paste paper 2 on new layer then select invert and tap delete key. Unselect and delete original layer.
On Raster Layer 12 & 11 Add Inner Bevel of choice then add gradient glow medium black
On Raster Layer 3 Select all float and defloat and copy and paste paper 10 on new layer then select invert and tap delete key. Unselect and delete original layer.
On Raster Layer 5 Select all float and defloat and copy and paste paper 6 on new layer then select invert and tap delete key. Unselect and delete original layer.
On Raster Layer 9 Select all float and defloat and copy and paste paper 11 on new layer then select invert and tap delete key. Unselect and delete original layer.
On Raster Layer 8 Select all float and defloat and copy and paste paper 2 on new layer then select invert and tap delete key. Unselect and delete original layer.
Now you can use elements of choice or you can use the ones I did. Please use my tag as a reference!
Rose resize 85% place behind tube
Cross resize 75% place just under word art at the top
Edacity resize 50%
Doodle3 rotate 90% resize 75%
Butterfly accent rotate 30 to left add gradient glow medium black
Doodle1 move to behind tag move to top left duplicate then mirror
flower2 resize 75% move beside tube
Now add a drop shadow to all layers
*****Optional for your tube******
I was turned on to this trick by a good friend of my named Kim. You can check her out Click Here See Kim!
On your tube if you want to make it kinda pop out a little more here is something you can do.
Duplicate your tube layer on the copy layer add a gaussian blur of 2.00 and move it below the original layer. On the original layer blend mode to hard light and change the opacity to 73. Merge the layer down and sharpen!
Crop/resize tag to your preference - add copyright/license & watermark & name ..Save as PNG or JPEG
Please leave me a comment to let me know how you liked my tutorial. And plese send me your results and I will post them up! I would love to see your results! My E-mail is Timeofyourlifescraps@yahoo.com
Labels:
Grunge N Glitter
|
Lust

by Sebrina on
July 8th, 2010
Any resemblance to another
tutorial is purely coincidental.
Do not copy this tutorial and post it through any group or claim it as your own.
For this Tutorial I'm using
The art of Ismael Rac. I got mine when he was with AMI!
You can purchase his artwork at
Rac Here
Please do not use the same tube(s) unless you have the appropriate license to do so.
Template #59 (Lustful) @ Kristin Wicked Scraps. Thanks so much! Here
Scrap kit Deadly Sin Collections Lust - by Grunge and Glitter.Thank you so much! Go Here To Purchase
Optional Plugins Gradient Glow.
This tutorial assumes you have a working knowledge of PSP.
Lets get started
Open your template
Ctrl+D to duplicate
Delete the copyright layer.
Increase Canvas Size to 600 x 600.
On Rectangle Layer Select all float and defloat and copy and paste paper 1 on new layer then select invert and tap delete key. Unselect and delete original layer.
On Doodle Layer Select all float and defloat and copy and paste paper 5 on new layer then select invert and tap delete key. Unselect and delete original layer. Add Gradient Glow medium white.
On Word Art Layer Select all float and defloat. Add new layer flood fill white then merge down.
Now you can use elements of choice or you can use the ones I did. Please use my tag as a reference!
Definition resize 50% add gradient glow and drop shadow
Umbrella free rotate right 25.00 place under tag behind tube
Desire word art resize 50% Add Graident Glow White med and add drop shadow
Rose resize 65% rotate right 75
Candle1 resize 50% Place behind tube Duplicate and mirror
Iron Element resize 50% place on rectangle change blend mode to overlay then duplicate and mirror.
Now add a drop shadow to all layers
*****Optional for your tube******
I was turned on to this trick by a good friend of my named Kim. You can check her out Click Here See Kim!
On your tube if you want to make it kinda pop out a little more here is something you can do.
Duplicate your tube layer on the copy layer add a gaussian blur of 2.00 and move it below the original layer. On the original layer blend mode to hard light and change the opacity to 73. Merge the layer down and sharpen!
Crop/resize tag to your preference - add copyright/license & watermark & name ..Save as PNG or JPEG
Please leave me a comment to let me know how you liked my tutorial. And plese send me your results and I will post them up! I would love to see your results! My E-mail is Timeofyourlifescraps@yahoo.com
Labels:
Grunge N Glitter
|
Tuesday, February 11, 2014
The Craft

by Sebrina on
July 8th, 2010
Any resemblance to another
tutorial is purely coincidental.
Do not copy this tutorial and post it through any group or claim it as your own.
For this tutorial, I’m using
The Poser that was included in the kit!
Template #29 @ Kristin Wicked Scraps. Thanks so much! Here
Scrap kit The Craft - by Brandi @ Grunge and Glitter.Thank you so much! Go Here To Purchase
Optional Plugins Gradient Glow.
This tutorial assumes you have a working knowledge of PSP.
Lets get started
Open your template
Ctrl+D to duplicate
Delete the copyright layer.
Increase Canvas Size to 600 x 600.
On Splat Layer Select all float and defloat and copy and paste paper 7 on new layer then select invert and tap delete key. Unselect and delete original layer.
On Rectangle fill Layer Select all float and defloat and copy and paste paper 6 on new layer then select invert and tap delete key. Unselect and delete original layer.
On Word Art 1 Layer Select all float and defloat and copy and paste paper 5 on new layer then select invert and tap delete key. Unselect and delete original layer. Add Gradient Glow medium white add drop show.
On Word Art 2 Layer Select all float and defloat and copy and paste paper 2 on new layer then select invert and tap delete key. Unselect and delete original layer. Add Gradient Glow medium black add drop shadow
Now you can use elements of choice or you can use the ones I did. Please use my tag as a reference!
Witch Cookie Poser... Resize 75 % then again at 80% place behind word art layer 2
Crystal Ball resize 50% then again 90% place in front of tube
Magic resize 50% 2 times place inside of crystal ball
Casket rotate resize 75%
Standing Light resize 75% Duplicate and mirror place behind tag
Pentagram resize 45% then again at 30% place lower right of tag
Now add a drop shadow to all layers
*****Optional for your tube******
I was turned on to this trick by a good friend of my named Kim. You can check her out Click Here See Kim!
On your tube if you want to make it kinda pop out a little more here is something you can do.
Duplicate your tube layer on the copy layer add a gaussian blur of 2.00 and move it below the original layer. On the original layer blend mode to hard light and change the opacity to 73. Merge the layer down and sharpen!
Crop/resize tag to your preference - add copyright/license & watermark & name ..Save as PNG or JPEG
Please leave me a comment to let me know how you liked my tutorial. And plese send me your results and I will post them up! I would love to see your results! My E-mail is Timeofyourlifescraps@yahoo.com
Labels:
Grunge N Glitter
|
Monday, February 10, 2014
Artistic

by Sebrina Wainner on
July 5th, 2010
Any resemblance to another
tutorial is purely coincidental.
Do not copy this tutorial and post it through any group or claim it as your own.
For this tutorial, I’m using
The art of Ismel Rac. I got mine when he was with AMI!
You can purchase his artwork at
Here
Please do not use the same tube(s) unless you have the appropriate license to do so.
Template #29 @ Addictive Pleasures. Thanks so much! Here
Scrap kit Artistic Expression - by Brandi @ Grunge and Glitter.Thank you so much! Go Here To Purchase
Optional Plugins Penta Jeans and Gradient Glow.
This tutorial assumes you have a working knowledge of PSP.
Lets get started
Open your template
Ctrl+D to duplicate
Delete the copyright layer.
On Strip Layer Select all float and defloat and copy and paste paper 19 on new layer then select invert and tap delete key. Unselect and delete original layer.
On Strip 2 Layer Select all float and defloat and copy and paste paper 11 on new layer then select invert and tap delete key. Unselect and delete original layer.
On Strip 3 Layer Select all float and defloat and copy and paste paper 20 on new layer then select invert and tap delete key. Unselect and delete original layer.
On Rectangle Layer Select all float and defloat and copy and paste paper 12 on new layer then select invert and tap delete key. Unselect and delete original layer.
On Circle 2 Layer Select all float and defloat and copy and paste paper 16 on new layer then select invert and tap delete key. Unselect and delete original layer.
On Strips Layer Select all float and defloat and copy and paste paper 9 on new layer then select invert and tap delete key. Unselect and delete original layer.
On Small Circle 2 Layer Select all float and defloat and copy and paste paper 13 on new layer then select invert and tap delete key. Unselect and delete original layer.
Add tube of choice to circle 2 layer erase any hang over of the tube then change the blend mode to Luminance Legacy then add penta jeans to the tube. Amount 62 and border-4
Now you can use elements of choice or you can use the ones I did. Please use my tag as a reference!
bead scatter 2 place above the background layer
word art 2 place to the bottom left of tag and add gradient glow of pride
paint splats resize 60% place to the top right of tag
glitter splats resize 60% place above the word art layer.
Bow 4 resize 35% and place in middle of the tag to connect the 2 circle frames.
Deco Heart resize 50% place behind tube.
Now add a drop shadow to all layers
*****Optional for your tube******
I was turned on to this trick by a good friend of my named Kim. You can check her out Click Here See Kim!
On your tube if you want to make it kinda pop out a little more here is something you can do.
Duplicate your tube layer on the copy layer add a gaussian blur of 2.00 and move it below the original layer. On the original layer blend mode to hard light and change the opacity to 73. Merge the layer down and sharpen!
Crop/resize tag to your preference - add copyright/license & watermark & name ..Save as PNG or JPEG
Please leave me a comment to let me know how you liked my tutorial. And plese send me your results and I will post them up! I would love to see your results! My E-mail is Timeofyourlifescraps@yahoo.com
Labels:
Grunge N Glitter
|
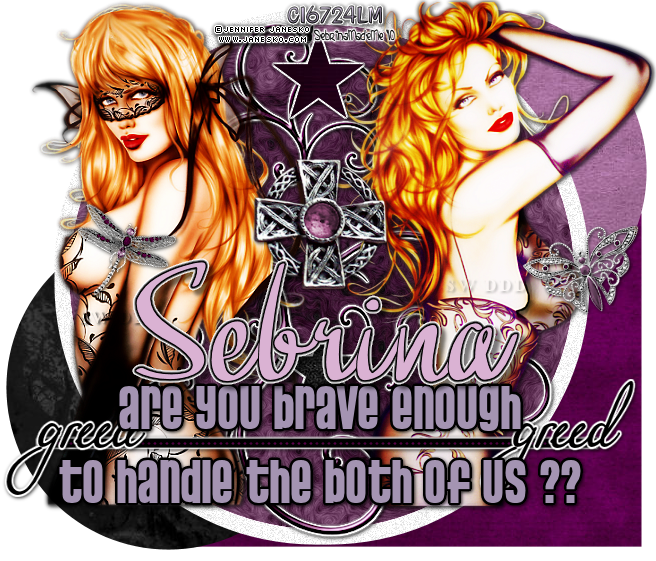
Greed
by Sebrina Wainner on
June 20, 2010
Any resemblance to another
tutorial is purely coincidental.
Do not copy this tutorial and post it through any group or claim it as your own.
For this tutorial, I’m using
The art of Jennifer Janesko.
You can purchase her artwork at
CDO
Please do not use the same tube(s) unless you have the appropriate license to do so.
Template #357 by Missy @ Divine Intentionz. Thanks so much Missy! Here
Scrap kit Deadly Sins- Greed by Brandi @ Grunge and Glitter.Thank you so much! Go Here To Purchase
Optional Plugins Eyecandy Swirl and Bright Noise and Gradient Glow.
This tutorial assumes you have a working knowledge of PSP.
Lets get started
Open your template
Ctrl+D to duplicate
Delete the copyright layer
Delete the background layer.
Delete the Frame Background, Glitter Frame, Film Strip, Frame Background2, Glitter Frame2, and Film Strip2 and Circle 1.
On Raster Layer 2 Select all float and defloat and copy and paste paper 7 on new layer then select invert and tap delete key. Unselect and delete original layer.
On Small Circle left layer Select all float and defloat and copy and paste paper 9 on new layer then select invert and tap delete key. Unselect and delete original layer.
On Small Circle right layer Select all float and defloat and copy and paste paper 8 on new layer then select invert and tap delete key. Unselect and delete original layer.
On Circle 3 layer add Bright Noise Default Settings.
On Circle 2 layer Select all float and defloat and copy and paste paper 4 on new layer then select invert and tap delete key. Unselect and delete original layer. Apply Eye Candy Swirl Featured Small Swirl.
On Star 1 layer Select all float and defloat and copy and paste paper 1 on new layer then select invert and tap delete key. Unselect and delete original layer.
On Rectangle layer Add Gradient Glow Thin White.
On dotted line layer Select all float and defloat and copy and paste paper 7 on new layer then select invert and tap delete key. Unselect and delete original layer.
On Star 2 layer Select all float and defloat and copy and paste paper 6 on new layer then select invert and tap delete key. Unselect and delete original layer.
On Wordart Layer Select all float and defloat and copy and flood fill with color from tube on new layer then. Add gradient glow medium black around flood filled wordart. Unselect and delete original layer.
Now you can use elements of choice or you can use the ones I did. Please use my tag as a reference!
Butterfly resize @50% then again at 75% place on right side of tag
Open definition and cut out word "greed" paste as a new layer add gradient glow thin white and place below the word art layer. Duplicate and move to the other side of word art.
Dragon Fly resize 26% place to the left side of tag.
Flourish2 resize 75% and place on circle layer
Broach2 rezise 50% then 75% and place in center of tag.
Move one star to the top of the tag and place the 2nd star half way under word art layer.
Now add a drop shadow to all layers
*****Optional for your tube******
I was turned on to this trick by a good friend of my named Kim. You can check her out Click Here See Kim!
On your tube if you want to make it kinda pop out a little more here is something you can do.
Duplicate your tube layer on the copy layer add a gaussian blur of 2.00 and move it below the original layer. On the original layer blend mode to hard light and change the opacity to 73. Merge the layer down and sharpen!
Crop/resize tag to your preference - add copyright/license & watermark & name ..Save as PNG or JPEG
Please leave me a comment to let me know how you liked my tutorial. And plese send me your results and I will post them up! I would love to see your results! My E-mail is Timeofyourlifescraps@yahoo.com
Labels:
Grunge N Glitter
|
Hey Girlfriend

by Sebrina on
June 19, 2010
Any resemblance to another
tutorial is purely coincidental.
Do not copy this tutorial and post it through any group or claim it as your own.
For this tutorial, I’m using
The art of Elias Chatzoudis.
You can purchase his artwork
Here
Please do not use the same tube(s) unless you have the appropriate license to do so.
Template #42 By Tami @ Addictive Pleasures! Thank you so much! Here
Scrap kit Hey Girlfriend by Brandi @ Grunge and Glitter.Thank you so much! Go Here To Purchase
This tutorial assumes you have a working knowledge of PSP.
Lets get started
Open your template
Ctrl+D to duplicate
Delete the copyright layer
Delete background and strip2.
On Rectangle layer Select all float and defloat and copy and paste paper 17 on new layer then select invert and tap delete key. Unselect and delete original layer.
On Rectangle 2 layer Select all float and defloat and copy and paste paper 16 on new layer then select invert and tap delete key. Unselect and delete original layer.
On Rectangle 3 layer Select all float and defloat and copy and paste paper 19 on new layer then select invert and tap delete key. Unselect and delete original layer.
On Rectangle 4 layer Select all float and defloat and copy and paste paper 22 on new layer then select invert and tap delete key. Unselect and delete original layer.
On Rectangle 5 layer Select all float and defloat and copy and paste paper 15 on new layer then select invert and tap delete key. Unselect and delete original layer.
On Circle layer Select all float and defloat and copy and paste paper 2 on new layer then select invert and tap delete key. Unselect and delete original layer.
On Strip layer Select all float and defloat and copy and paste paper 9 on new layer then select invert and tap delete key. Unselect and delete original layer.
On Text 1 & 2 layer add inner bevel of choice add gradient glow of purple and add white drop shadow.
Add any elements of choice ... see my tag for reference on where to place
Beaded Heart resize 85% place on circle layer.
Wordart 3 resize 50% then again at 85% place behind tube see my tag for placing exactly
Word art 2 rotate to right and place into top right of tag
Smile resize 50% rotate right and place on shirt if using same tube or one similar.
Charm bracelet -- resize 50% 3 times and place around wrist to look like she is wearing it.
Heart pin 2 resize 25% place between words text me on top left.
Butterfly1 resize 25% and place below word art text me. see my tag for reference.
Purse 1 resize 25% and place at bottom right just above word art "its a text thing"
MP3 player resize 25% and place beside purse.
Flair 1 resize 25% and place above purse.
*****Optional for your tube******
I was turned on to this trick by a good friend of my named Kim. You can check her out Click Here See Kim!
On your tube if you want to make it kinda pop out a little more here is something you can do.
Duplicate your tube layer on the copy layer add a gaussian blur of 2.00 and move it below the original layer. On the original layer blend mode to hard light and change the opacity to 73. Merge the layer down and sharpen!
Crop/resize tag to your preference - add copyright/license & watermark & name ..Save as PNG or JPEG
Please leave me a comment to let me know how you liked my tutorial. And plese send me your results and I will post them up! I would love to see your results! My E-mail is DazzlinDivasDesign@yahoo.com
Labels:
Grunge N Glitter
|
Dark Angel

by Sebrina on
June 18, 2010
Any resemblance to another
tutorial is purely coincidental.
Do not copy this tutorial and post it through any group or claim it as your own.
For this tutorial, I’m using
The art of Gennadiy Koufay. I bought his tubes when he was with CILM but I can't find where he is selling now.
Please do not use the same tube(s) unless you have the appropriate license to do so.
Template I Do Bad Things Well from Abstracthalocreations. Thank you so much! Here
Scrap kit Dark Angel by Brandi @ Grunge and Glitter.Thank you so much! Go Here To Purchase
Font of choice or the one I have used is Honey Scrpit.
Optional Plugins Alien Skin Electrify.
This tutorial assumes you have a working knowledge of PSP.
Lets get started
Open your template
Ctrl+D to duplicate
Delete the copyright layer
Delete the background layer.
On Raster Layer 5 Select all float and defloat and copy and paste paper 8 on new layer then select invert and tap delete key. Unselect and delete original layer.
On Raster Layer 2 Select all float and defloat and copy and paste paper 4 on new layer then select invert and tap delete key. Unselect and delete original layer.
On Raster Layer 3 Select all float and defloat and copy and paste paper 14 on new layer then select invert and tap delete key. Unselect and delete original layer.
On Raster Layer 4 Select all float and defloat and copy and paste paper 11 on new layer then select invert and tap delete key. Unselect and delete original layer.
On Raster Layer 6 Select all float and defloat and copy and paste paper 7 on new layer then select invert and tap delete key. Unselect and delete original layer.
On Raster Layer 8 The Word Art... Add Inner Bevel I used Width 5 Smoothness 33 Depth 3 Ambience -8 Shininess 44 Angle 320 Intensity 31 Elevation 54
Add Gradient Glow Width of 3 Soft Corners 25 Thin White
Put your tube of choice inside the top circle to the far left side duplicate and mirror. Change the blend mode on both copies to Luminance Legacy. Now this is optional On each of the tubes layers add Electrify from Alien Skin .....with the settings Inner white Outer Black and width and opicaty at default settings. Chose radiate from center Spacing 35 Thickness 40 Branching 60 Length 100 Jaggedness 60 Spread 60
Now place the original tube in the center and make it a little bigger than what you placed in the circle.... See my tag for reference.
Now you can use elements of choice or you can use the ones I did.
I used candle 2 and I placed it on the left side under the word art duplicated and mirrored.
Ribbon 2 I placed behide the word art layers at the top and the bottom.
Cross resize at 50% and again at 75%. Place in the center of candle duplicate and mirror.
Heart1 resize at 40% place on the candle holder duplicate and mirror.
Now add a drop shadow to all layers
*****Optional for your tube******
I was turned on to this trick by a good friend of my named Kim. You can check her out Click Here See Kim!
On your tube if you want to make it kinda pop out a little more here is something you can do.
Duplicate your tube layer on the copy layer add a gaussian blur of 2.00 and move it below the original layer. On the original layer blend mode to hard light and change the opacity to 73. Merge the layer down and sharpen!
Crop/resize tag to your preference - add copyright/license & watermark & name ..Save as PNG or JPEG
Please leave me a comment to let me know how you liked my tutorial. And plese send me your results and I will post them up! I would love to see your results! My E-mail is Timeofyourlifescraps@yahoo.com
Labels:
Grunge N Glitter
|
Subscribe to:
Posts (Atom)
Grab My Blinkie