About Me

- SNC
- Hi I am very laid back and easy to get along with! I am 41 years old and I have 1wonderful girl. I have been psping for over 4 years now and I'm up to learning new things. Be on the look out for lots of new stuff!
My Favs!


Thursday, March 20, 2014
 B*tch With Attitude

by Sebrina on
March 20,2014
Any resemblance to another tutorial is purely coincidental.
Do not copy this tutorial and post it through any group or claim it as your own. Please just pass my blog for the tutorials!
For this Tutorial I'm using the art of Keith Gravey!You can purchase his tubes Here
I am using a mask from Millie's Psp Madness. Thanks for the Mask! Mask MPM Mask 12 and you can get it Here
Scrap kit Bitch With Attitude- by Kandii Popz Designz. Thank you so much! You can get this kit at Scrap-A-licious. Here
Optional Plugins Gradient Glow.
This tutorial assumes you have a working knowledge of PSP.
Lets get started
Open a new image 600 x 600
Copy and Paper 15 and add your mask and merge down.
Add tube so you can work around it.
Glitter resize 75% paste on the tag.
Bubbles paste on the tag on the right side.
Boots resize 75% paste on the left side of the tag.
Word Art 1 resize 50% paste on the upper left of the tag.
Sparkles 2 paste on the tag.
Notes mirror paste along the bottom of the tag.
Star Chain paste on the right side of the tag.
Glitter Stars on String paste on left under word art layer.
Butterfly resize 75% place in the upper right corner of the tag.
Bunny place in the lower left corner of the tag.
Lips resize 75% place in the lower left corner of the tag.
Now add a drop shadow to all layers
*****Optional for your tube******
I was turned on to this trick by a good friend of my named Kim. You can check her out Click Here See Kim!
On your tube if you want to make it kinda pop out a little more here is something you can do.
Duplicate your tube layer on the copy layer add a gaussian blur of 2.00 and move it below the original layer. On the original layer blend mode to hard light and change the opacity to 73. Merge the layer down and sharpen!
Crop/resize tag to your preference - add copyright/license & watermark & name ..Save as PNG or JPEG
Please leave me a comment to let me know how you liked my tutorial. And please send me your results and I will post them up! I would love to see your results! My E-mail is TimeOfYourLifeScraps@yahoo.com
Girlz Rock

by Sebrina on
March 20,2014
Any resemblance to another tutorial is purely coincidental.
Do not copy this tutorial and post it through any group or claim it as your own. Please just pass my blog for the tutorials!
For this Tutorial I'm using the art of Keith Gravey!You can purchase his tubes Here
I am using a mask from Millie's Psp Madness. Thanks for the Mask! Mask MPM Mask 07 and you can get it Here
Scrap kit Rock Girls Rule - by Kandii Popz Designs. Thank you so much! You can get this kit at Kandii Popz Designs blog. Here
Optional Plugins Gradient Glow.
This tutorial assumes you have a working knowledge of PSP.
Lets get started
Open a new image 600 x 600
Copy and Paper 6 and add your mask and merge down.
Add tube so you can work around it.
Wire paste on the tag.
Sparkles 2 paste on the tag on the right.
Keyboard resize 85% paste at the bottom of the tag.
Music Notes resize 85% paste on the keyboard.
Star paste in the center of the tag.
Cross resize 50% paste at the top left of the tag.
Barbed heart resize 75% paste top right corner of the tag.
Flamed Skull resize 50% mirror and paste lower right of the tag on the keyboard.
City resize 60% paste behind the keyboard.
Heart resize 50% paste in the lower left of tag.
Note paste on the right side middle of the tag.
Now add a drop shadow to all layers
*****Optional for your tube******
I was turned on to this trick by a good friend of my named Kim. You can check her out Click Here See Kim!
On your tube if you want to make it kinda pop out a little more here is something you can do.
Duplicate your tube layer on the copy layer add a gaussian blur of 2.00 and move it below the original layer. On the original layer blend mode to hard light and change the opacity to 73. Merge the layer down and sharpen!
Crop/resize tag to your preference - add copyright/license & watermark & name ..Save as PNG or JPEG
Please leave me a comment to let me know how you liked my tutorial. And please send me your results and I will post them up! I would love to see your results! My E-mail is TimeOfYourLifeScraps@yahoo.com
Married

by Sebrina on
March 20,2014
Any resemblance to another
tutorial is purely coincidental.
Do not copy this tutorial and post it through any group or claim it as your own. Please just pass my blog for the tutorials!
For this Tutorial I'm using the art of PinUp Toons!You can purchase his tubes Here
I am using a mask from Designs By Vaybs. Thanks for the Mask! Mask DBV Maks102 and you can get it Here
Scrap kit Spring Romance by Amy Marie. Thank you so much! You can buy this kit Here
Optional Plugins Gradient Glow.
This tutorial assumes you have a working knowledge of PSP.
Lets get started
Open a new image 600 x 600
Copy and paste paper 10 and add your mask and merge down.
Element 102 paste on the tag.
Element 119 paste at the top of the tag then duplicate and flip .
Element 118 duplicate and merge down then paste at the top of the page and duplicate and flip.
Element 41 resize 50% paste in the upper left of tag and duplicate and mirror.
Element 89 paste behind the mask layer at the top then duplicate and flip.
Element 71 paste on the lower right of tag.
Element 73 resize 50 % paste in the lower left of tag.
Element 125 resize 75% paste in the lower right hand corner behind the glass.
Now add a drop shadow to all layers
*****Optional for your tube******
I was turned on to this trick by a good friend of my named Kim. You can check her out Click Here See Kim!
On your tube if you want to make it kinda pop out a little more here is something you can do.
Duplicate your tube layer on the copy layer add a gaussian blur of 2.00 and move it below the original layer. On the original layer blend mode to hard light and change the opacity to 73. Merge the layer down and sharpen!
Crop/resize tag to your preference - add copyright/license & watermark & name ..Save as PNG or JPEG
Please leave me a comment to let me know how you liked my tutorial. And please send me your results and I will post them up! I would love to see your results! My E-mail is TimeOfYourLifeScraps@yahoo.com
Sunday, March 16, 2014
Spring Rainbow
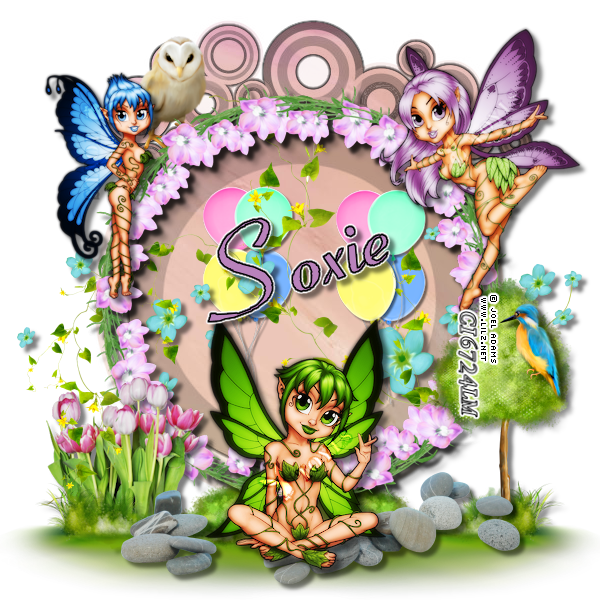
by Sebrina on
March 16,2014
Any resemblance to another
tutorial is purely coincidental.
Do not copy this tutorial and post it through any group or claim it as your own. Please just pass my blog for the tutorials!
For this Tutorial I'm using the art of Joel Adams!You can purchased his tubes Here
I am using a mask from Designs By Vaybs. Thanks for the Mask! Mask DBV Maks45 and you can get it Here
Scrap kit Spring Rainbow- by Soxsational Scraps. Thank you so much! You can buy this kit at Exquisite Scraps! Here
Optional Plugins Gradient Glow.
This tutorial assumes you have a working knowledge of PSP.
Lets get started
Open a new image 600 x 600
Copy and paste paper 11 and add your mask and merge down & flip.
Add tube so you can work around it.
Grass mound paste below cirlce on left then duplicate and mirror.
Rocks paste on the grass layer.
Flower frame 2 resize 75% paste in the center of the tag.
Flower scatters paste in the center of the tag.
Owl resize 35% paste at the top left of the tag.
Tulips resize 50% paste under the grass layer on the left side.
Leaf1 paste in center of the tag under the frame.
Tree resize 50% paste on the right side of the tag.
Bird resize 35% and mirror paste on the tree.
Balloons1 resize 50% paste on the right side inside the frame.
Balloons2 mirror resize 50% paste beside Balloons1 merge together then duplicate and mirror.
Now add a drop shadow to all layers
*****Optional for your tube******
I was turned on to this trick by a good friend of my named Kim. You can check her out Click Here See Kim!
On your tube if you want to make it kinda pop out a little more here is something you can do.
Duplicate your tube layer on the copy layer add a gaussian blur of 2.00 and move it below the original layer. On the original layer blend mode to hard light and change the opacity to 73. Merge the layer down and sharpen!
Crop/resize tag to your preference - add copyright/license & watermark & name ..Save as PNG or JPEG
Please leave me a comment to let me know how you liked my tutorial. And please send me your results and I will post them up! I would love to see your results! My E-mail is TimeOfYourLifeScraps@yahoo.com
Bleeding Love

by Sebrina on
March 16,2014
Any resemblance to another
tutorial is purely coincidental.
Do not copy this tutorial and post it through any group or claim it as your own. Please just pass my blog for the tutorials!
For this Tutorial I'm using the art of Barbara Jensen!You can purchase her tubes Here
I am using a mask from Designs By Vaybs. Thanks for the Mask! Mask DBV Maks89 and you can get it Here
Scrap kit ScrapBCS_IB-Anna Marine-45-2- by Babycakes Scraps. Thank you so much! You can buy this kit at CDO! Here
Optional Plugins Gradient Glow.
This tutorial assumes you have a working knowledge of PSP.
Lets get started
Open a new image 600 x 600
Copy and paste paper 4 and add your mask and merge down.
Add tube so you can work around it.
Element 13 paste on the tag.
Element 5 paste on the tag.
Element 28 resize 85% paste at the bottom of the tag and add gradient glow fat to it.
Element 1 resize 60% paste at the top left of the tag.
Element 8 resize 60% mirror paste on the right side of the tag.
Element 10 resize 50% paste on the left side of the tag.
Element 15 resize 50% place on the right side of the tag.
Element 24 resize 60% place at the top right of the tag.
Element 22 resize 50% place center left of the tag.
Now add a drop shadow to all layers
*****Optional for your tube******
I was turned on to this trick by a good friend of my named Kim. You can check her out Click Here See Kim!
On your tube if you want to make it kinda pop out a little more here is something you can do.
Duplicate your tube layer on the copy layer add a gaussian blur of 2.00 and move it below the original layer. On the original layer blend mode to hard light and change the opacity to 73. Merge the layer down and sharpen!
Crop/resize tag to your preference - add copyright/license & watermark & name ..Save as PNG or JPEG
Please leave me a comment to let me know how you liked my tutorial. And please send me your results and I will post them up! I would love to see your results! My E-mail is TimeOfYourLifeScraps@yahoo.com
Diva

by Sebrina on
March 16,2014
Any resemblance to another
tutorial is purely coincidental.
Do not copy this tutorial and post it through any group or claim it as your own. Please just pass my blog for the tutorials!
I am using the art work of Elias Chatzoudis . You can buy his tubes Here!
I am using a mask from Designs By Vaybs. Thanks for the Mask! Mask DBV Maks144 and you can get it Here
Scrap kit Chick Named Diva by Amy Marie. Thank you so much! You can buy this kit Here
Optional Plugins Gradient Glow.
This tutorial assumes you have a working knowledge of PSP.
Lets get started
Open a new image 600 x 600
Copy and paste paper 17 and add your mask and merge down.
Element 78 Mirror and paste in the center of the tag.
Element 77 paste in the center of the tag.
Element 44 paste at the right side of the tag.
Element 26 resize 50% paste upper left hand corner.
Element 58 resize 75% paste in lower right hand corner.
Element 59 resize 65% paste on element 58 in lower right hand corner .
Element 3 resize 35% paste on the candles.
Element 163 resize 50% paste lower left hand corner.
Element 61 resize 50% paste lower left hand corner on top of boxes.
Element 69 resize 50% paste upper right corner of the tag.
Element 139 resize 75% paste middle left of the tag beside the candles.
Element 23 resize 65% paste middle center of tag duplicate & change blend mode to hard Light and merge down.
Element 90 resize 75% paste on the mask layer.
Element 8 paste on the tag.
Now add a drop shadow to all layers
*****Optional for your tube******
I was turned on to this trick by a good friend of my named Kim. You can check her out Click Here See Kim!
On your tube if you want to make it kinda pop out a little more here is something you can do.
Duplicate your tube layer on the copy layer add a gaussian blur of 2.00 and move it below the original layer. On the original layer blend mode to hard light and change the opacity to 73. Merge the layer down and sharpen!
Crop/resize tag to your preference - add copyright/license & watermark & name ..Save as PNG or JPEG
Please leave me a comment to let me know how you liked my tutorial. And please send me your results and I will post them up! I would love to see your results! My E-mail is TimeOfYourLifeScraps@yahoo.com
Shamrocks

by Sebrina on
March 16,2014
Any resemblance to another
tutorial is purely coincidental.
Do not copy this tutorial and post it through any group or claim it as your own. Please just pass my blog for the tutorials!
For this Tutorial I'm using the art of Keith Gravey!You can purchase his tubes Here
I am using a mask from Designs By Vaybs. Thanks for the Mask! Mask DBV Maks89 and you can get it Here
Scrap kit Shake Your Shamrocks- by Black Widow Creationz. Thank you so much! You can get this kit at Black Widow Creationz. Here
Optional Plugins Gradient Glow.
This tutorial assumes you have a working knowledge of PSP.
Lets get started
Open a new image 600 x 600
Copy and Paper 1 and add your mask and merge down.
Add tube so you can work around it.
Element 13 paste on the mask layer.
Element 28 in the center of the tag.
Element 18 resize 75% paste on the tag tilt to the left.
Element 9 paste on the tag and tilt to the right.
Element 24 resize 50% paste on the left side and then duplicate and mirror.
Element 12 rotate to the right paste at the bottom center of tag.
Element 19 paste along the bottom of the tag.
Now add a drop shadow to all layers
*****Optional for your tube******
I was turned on to this trick by a good friend of my named Kim. You can check her out Click Here See Kim!
On your tube if you want to make it kinda pop out a little more here is something you can do.
Duplicate your tube layer on the copy layer add a gaussian blur of 2.00 and move it below the original layer. On the original layer blend mode to hard light and change the opacity to 73. Merge the layer down and sharpen!
Crop/resize tag to your preference - add copyright/license & watermark & name ..Save as PNG or JPEG
Please leave me a comment to let me know how you liked my tutorial. And please send me your results and I will post them up! I would love to see your results! My E-mail is TimeOfYourLifeScraps@yahoo.com
Friday, March 14, 2014
Lacy

by Sebrina on
Febuary 28,2014
Any resemblance to another
tutorial is purely coincidental.
Do not copy this tutorial and post it through any group or claim it as your own. Please just pass my blog for the tutorials!
I am using the art work of Joel Adams. You can buy his tubes at CDO! Here
I am using a mask from Designs By Vaybs. Thanks for the Mask! Mask DBV Maks02 and you can get it Here
Scrap kit ScrapBCS_IB-Lacy Clagg-2-3 by Babycakes Scraps. Thank you so much! You can buy this kit at CDO! Here
Optional Plugins Gradient Glow.
This tutorial assumes you have a working knowledge of PSP.
Lets get started
Open a new image 600 x 600
Copy and paste paper 4 and add your mask and merge down.
Element 5 paste in the center of tag.
Element 18 paste at the bottom of tag.
Element 1 resize 50% paste upper left of the tag.
Element 21 resize 50% paste upper right of the tag.
Element27 resize 50% pste in the upper middle of the tag.
Element 14 resize 40% paste on the right side of the grass.
Element 22 resize 65% mirror paste to the left of the grass.
Element 11 paste under the mask layer to the right then duplicate flip and mirror.
Element 10 Mirror paste under the mask layer on the duplicate and mirror.
Element 12 resize 65% paste on the star.
Element 7 resize 35% place on the mushroom house.
ELement 20 resize 45% place to hang on the g in laugh.
Now add a drop shadow to all layers
*****Optional for your tube******
I was turned on to this trick by a good friend of my named Kim. You can check her out Click Here See Kim!
On your tube if you want to make it kinda pop out a little more here is something you can do.
Duplicate your tube layer on the copy layer add a gaussian blur of 2.00 and move it below the original layer. On the original layer blend mode to hard light and change the opacity to 73. Merge the layer down and sharpen!
Crop/resize tag to your preference - add copyright/license & watermark & name ..Save as PNG or JPEG
Please leave me a comment to let me know how you liked my tutorial. And please send me your results and I will post them up! I would love to see your results! My E-mail is TimeOfYourLifeScraps@yahoo.com
Spring Chick

by Sebrina on
March 13,2014
Any resemblance to another
tutorial is purely coincidental.
Do not copy this tutorial and post it through any group or claim it as your own. Please just pass my blog for the tutorials!
For this Tutorial I'm using the art of PinUp Toons!You can purchase his tubes Here
I am using a mask from Rissa Deisgns. Thanks for the Mask! Mask RDMask08 and you can get it Here
Scrap kit Spring Chick by Amy Marie. Thank you so much! You can buy this kit Here
Optional Plugins Gradient Glow.
This tutorial assumes you have a working knowledge of PSP.
Lets get started
Open a new image 600 x 600
Copy and paste paper 30 and add your mask and merge down.
Add tube so you can work around it.
Element 7 Paste on the mask layer.
Element 132 Paste in the center of tag.
Element 2 paste at the top of the tag then duplicate and mirror.
Element 123 resize 75% paste on right bottom corner of the tag.
Element 119 paste on the left side of the tag.
Element 116 paste in the center of the tag.
Element 120 resize 50% paste lower left on the flower.
Element 108 resize 35% paste upper right of the tag.
Element 83 resize 35% paste in the lower right on the flowers.
Element 137 rotate right resize 50% paste in the center of the tag.
Element 145 paste in the center of the tag.
Element 97 resize 50% paste upper left of tag.
Now add a drop shadow to all layers
*****Optional for your tube******
I was turned on to this trick by a good friend of my named Kim. You can check her out Click Here See Kim!
On your tube if you want to make it kinda pop out a little more here is something you can do.
Duplicate your tube layer on the copy layer add a gaussian blur of 2.00 and move it below the original layer. On the original layer blend mode to hard light and change the opacity to 73. Merge the layer down and sharpen!
Crop/resize tag to your preference - add copyright/license & watermark & name ..Save as PNG or JPEG
Please leave me a comment to let me know how you liked my tutorial. And please send me your results and I will post them up! I would love to see your results! My E-mail is TimeOfYourLifeScraps@yahoo.com
Sunday, March 9, 2014
Forbidden Angel

by Sebrina on
March 7,2014
Any resemblance to another
tutorial is purely coincidental.
Do not copy this tutorial and post it through any group or claim it as your own. Please just pass my blog for the tutorials!
For this Tutorial I'm using the art of Zindy Neilsen!You can purchase her tubes Here
I am using a mask from Weescotslass Creations. Thanks for the Mask! Mask WSL MASK120 and you can get it Here
Scrap kit Forbidden Love- by Black Widow Creationz. Thank you so much! You can get this kit for FREE Here!
Optional Plugins Gradient Glow.
This tutorial assumes you have a working knowledge of PSP.
Lets get started
Open a new image 600 x 600
Copy and paste paper 14 and add your mask and merge down.
Add tube so you can work around it.
Element 60 paste on the mask layer.
Element 10 flip paste below the mask layer to the right side.
Element 42 paste on the right side and duplicate and mirror.
Element 27 resize 75 % and mirror and Element 26 resize 75% layer the roses paste on the left hand side corner.
Element 13 resize 50% make it "hang" in the top left hand corner.
Element 39 mirror and resize 50% ELement 38 resize 50% merge together and paste in the lower right hand corner of the tag.
Element 12 resize 50% earse chain place at the center top.
Now add a drop shadow to all layers
*****Optional for your tube******
I was turned on to this trick by a good friend of my named Kim. You can check her out Click Here See Kim!
On your tube if you want to make it kinda pop out a little more here is something you can do.
Duplicate your tube layer on the copy layer add a gaussian blur of 2.00 and move it below the original layer. On the original layer blend mode to hard light and change the opacity to 73. Merge the layer down and sharpen!
Crop/resize tag to your preference - add copyright/license & watermark & name ..Save as PNG or JPEG
Please leave me a comment to let me know how you liked my tutorial. And please send me your results and I will post them up! I would love to see your results! My E-mail is TimeOfYourLifeScraps@yahoo.com
Tough Love

by Sebrina on
March 7,2014
Any resemblance to another
tutorial is purely coincidental.
Do not copy this tutorial and post it through any group or claim it as your own. Please just pass my blog for the tutorials!
For this Tutorial I'm using the art of Jamie Kidd!You can purchased his tubes Here
I am using a mask from Designs By Vaybs. Thanks for the Mask! Mask DBV Maks89 and you can get it Here
Scrap kit Tough Love- by Black Widow Creationz. Thank you so much! You can get this kit at Black Widow Creationz. Here
Optional Plugins Gradient Glow.
This tutorial assumes you have a working knowledge of PSP.
Lets get started
Open a new image 600 x 600
Copy and Paper 1 and add your mask and merge down.
Add tube so you can work around it.
Element 31 paste on the mask layer.
Element 13 resize 75% paste at the bottom of the tag.
Element 24 resize 75% paste in the center of the tag.
Element 5 resize 75% paste in the upper right of the tag.
Element 20 resize 75% paste in the upper left of the tag.
Element 16 resize 50% paste in the lower left of tag.
Element 36 resize 75% paste in the center of the tag.
Element 9 resize 40% paste in the lower left conrner of the tag.
Element 21 resize 40% paste in the upper middle of the tag.
Now add a drop shadow to all layers
*****Optional for your tube******
I was turned on to this trick by a good friend of my named Kim. You can check her out Click Here See Kim!
On your tube if you want to make it kinda pop out a little more here is something you can do.
Duplicate your tube layer on the copy layer add a gaussian blur of 2.00 and move it below the original layer. On the original layer blend mode to hard light and change the opacity to 73. Merge the layer down and sharpen!
Crop/resize tag to your preference - add copyright/license & watermark & name ..Save as PNG or JPEG
Please leave me a comment to let me know how you liked my tutorial. And please send me your results and I will post them up! I would love to see your results! My E-mail is TimeOfYourLifeScraps@yahoo.com
Wonderland

by Sebrina on
March 7,2014
Any resemblance to another
tutorial is purely coincidental.
Do not copy this tutorial and post it through any group or claim it as your own. Please just pass my blog for the tutorials!
I am using the art work of Elias Chatzoudis . You can buy his tubes Here!
I am using a mask from Millie's Psp Madness. Thanks for the Mask! Mask MPM Mask 07 and you can get it Here
Scrap kit Wonderland by Amy Marie. Thank you so much! You can buy this kit Here
Optional Plugins Gradient Glow.
This tutorial assumes you have a working knowledge of PSP.
Lets get started
Open a new image 600 x 600
Copy and paste paper 13 and add your mask and merge down.
Element 3 Mirror and place at the bottom of the tag.
Element 24 Place at the top of the mask layer.
Element 105 paste on the mask layer on the left.
Element 26 Place in the center of the tag.
Element 46 Place in the upper right of the tag.
Element 98 resize 50% Place in the lower left of the tag.
Element 45 resize 95% Place on the tag.
Element 48 resize 75% Place behind the grass on the right.
Element 47 resize 75% Place behind element 48 on the grass.
Element 49 Place behind the mask layer.
Element 14 resize 50% Place on right side of the tag.
Element 94 resize 50% Place at the bottom of the tag in the middle.
Now add a drop shadow to all layers
*****Optional for your tube******
I was turned on to this trick by a good friend of my named Kim. You can check her out Click Here See Kim!
On your tube if you want to make it kinda pop out a little more here is something you can do.
Duplicate your tube layer on the copy layer add a gaussian blur of 2.00 and move it below the original layer. On the original layer blend mode to hard light and change the opacity to 73. Merge the layer down and sharpen!
Crop/resize tag to your preference - add copyright/license & watermark & name ..Save as PNG or JPEG
Please leave me a comment to let me know how you liked my tutorial. And please send me your results and I will post them up! I would love to see your results! My E-mail is TimeOfYourLifeScraps@yahoo.com
Tuesday, March 4, 2014
Whips

by Sebrina on
March 3,2014
Any resemblance to another
tutorial is purely coincidental.
Do not copy this tutorial and post it through any group or claim it as your own. Please just pass my blog for the tutorials!
For this Tutorial I'm using the art of PinUp Toons!You can purchase his tubes Here
I am using a mask from Designs By Vaybs. Thanks for the Mask! Mask DBV Maks89 and you can get it Here
Scrap kit ScrapBCS_PinUpToons-Package-175 - by Babycake Scraps. Thank you so much! You can get this kit Here!
Optional Plugins Gradient Glow.
This tutorial assumes you have a working knowledge of PSP.
Lets get started
Open a new image 600 x 600
Copy and paste paper 19 and add your mask and merge down.
Add tube so you can work around it.
Element 63 paste on the mask layer then duplicate and mirror.
Element 24 resize 21% and again 70% paste on the mask layer.
Element 48 resize 70% place at the bottom of the tag.
Element 52 resize 50% place behind the word art on the left.
Element 72 resize 60% place beside word art on the right.
Element 45 paste on the center of the mask layer.
Element 11 mirror resize 60% paste upper left of the tag.
Element 37 resize 70% paste just above the boots.
Element 43 resize 75% add gradient glow place at the top of tag.
Element 10 paste on left side top under the cuffs.
Now add a drop shadow to all layers
*****Optional for your tube******
I was turned on to this trick by a good friend of my named Kim. You can check her out Click Here See Kim!
On your tube if you want to make it kinda pop out a little more here is something you can do.
Duplicate your tube layer on the copy layer add a gaussian blur of 2.00 and move it below the original layer. On the original layer blend mode to hard light and change the opacity to 73. Merge the layer down and sharpen!
Crop/resize tag to your preference - add copyright/license & watermark & name ..Save as PNG or JPEG
Please leave me a comment to let me know how you liked my tutorial. And plese send me your results and I will post them up! I would love to see your results! My E-mail is TimeOfYourLifeScraps@yahoo.com
Monday, March 3, 2014
Fairy Spring

by Sebrina on
March 3,2014
Any resemblance to another
tutorial is purely coincidental.
Do not copy this tutorial and post it through any group or claim it as your own. Please just pass my blog for the tutorials!
For this Tutorial I'm using the art of Barbara Jensen!You can purchase her tubes Here
I am using a mask from Designs By Vaybs. Thanks for the Mask! Mask DBV Maks89 and you can get it Here
Scrap kit Spring Things - by Amy Marie. Thank you so much! You can get this kit Here!
Optional Plugins Gradient Glow.
This tutorial assumes you have a working knowledge of PSP.
Lets get started
Open a new image 600 x 600
Copy and paste paper 89 and add your mask and merge down.
Add tube so you can work around it.
Element 52 duplicate and merge together paste on the mask layer in the center.
Element 192 place on the mask layer tilt to the right.
Element 196 place at the bottom of the tag.
Element 199 resize at 50% place on the left side of the tag.
Element 174 resize 90% paste on the tag under the grass.
Element 145 resize 50% paste under the Arch.
Element 14 paste on the grass.
Element 154 resize 70% paste on the grass.
Element 74 mirror and resize 70% place in the upper right of the tag.
Element 204 resize 50% tilt to the right and place on the left side of the tag in the upper middle.
Element 93 resize to 10% duplicate and paste all over the tree.
Now add a drop shadow to all layers
*****Optional for your tube******
I was turned on to this trick by a good friend of my named Kim. You can check her out Click Here See Kim!
On your tube if you want to make it kinda pop out a little more here is something you can do.
Duplicate your tube layer on the copy layer add a gaussian blur of 2.00 and move it below the original layer. On the original layer blend mode to hard light and change the opacity to 73. Merge the layer down and sharpen!
Crop/resize tag to your preference - add copyright/license & watermark & name ..Save as PNG or JPEG
Please leave me a comment to let me know how you liked my tutorial. And plese send me your results and I will post them up! I would love to see your results! My E-mail is TimeOfYourLifeScraps@yahoo.com
Saturday, March 1, 2014
Love

by Sebrina on
March 1,2014
Any resemblance to another
tutorial is purely coincidental.
Do not copy this tutorial and post it through any group or claim it as your own. Please just pass my blog for the tutorials!
For this Tutorial I'm using the art of Zindy Neilsen!You can purchase her tubes Here
I am using a mask from Designs By Vaybs. Thanks for the Mask! Mask DBV Maks02 and you can get it Here
Scrap kit Addicted 2 Love - by Black Widow Creationz. Thank you so much! You can get this kit for FREE Here!
Optional Plugins Gradient Glow.
This tutorial assumes you have a working knowledge of PSP.
Lets get started
Open a new image 600 x 600
Copy and paste paper 8 and add your mask and merge down.
Add tube so you can work around it.
Element 10 place at the bottom of the mask layer and add gradient glow fat.
Element 33 and 32 resize 50% mirror element 32 and place over element 33 and place at the top right of the tag.
Element 30 paste across the mask layer.
Element 13 paste over element 30 and lower the opacity to 50% and mirror.
Element 3 resize 75% and place beside the letter L.
Element 4 resize 50% and place off center of the candle.
Element 2 resize 35% and place off center of the candles.
Element 9 resize 50% place on the mask layer towards the upper left of the tag.
Element 18 resize 35% place above the E in love.
Element 28 resize 95% paste below the mask layer and tilt to the right.
Element 29 resize 95% paste below the mask layer and tilt to the left.
Now add a drop shadow to all layers
*****Optional for your tube******
I was turned on to this trick by a good friend of my named Kim. You can check her out Click Here See Kim!
On your tube if you want to make it kinda pop out a little more here is something you can do.
Duplicate your tube layer on the copy layer add a gaussian blur of 2.00 and move it below the original layer. On the original layer blend mode to hard light and change the opacity to 73. Merge the layer down and sharpen!
Crop/resize tag to your preference - add copyright/license & watermark & name ..Save as PNG or JPEG
Please leave me a comment to let me know how you liked my tutorial. And plese send me your results and I will post them up! I would love to see your results! My E-mail is TimeOfYourLifeScraps@yahoo.com
Fall Kisses

by Sebrina on
Febuary 28,2014
Any resemblance to another
tutorial is purely coincidental.
Do not copy this tutorial and post it through any group or claim it as your own. Please just pass my blog for the tutorials!
I am using the art work of Jennifer Janesko. You can buy her tubes at CDO! Here
I am using a mask from Millie's Psp Madness. Thanks for the Mask! Mask MPM Mask 12 and you can get it Here
Scrap kit ScrapBCS_IB-JenniferJanesko-150-2- by Babycakes Scraps. Thank you so much! You can buy this kit at CDO! Here
Optional Plugins Gradient Glow.
This tutorial assumes you have a working knowledge of PSP.
Lets get started
Open a new image 600 x 600
Copy and paste paper 5 and add your mask and merge down.
Element 31 paste in lower left of the tag at the base of the mask duplicate and mirror.
Element 2 resize 50% place at the lower left of the tag then resize again at 75% then place on top of the bigger candle.
Element 8 paste at the upper right of the tag.
Element 21 mirror place to the right on the tag.
Element 26 tilt to the left and place in the upper left of the tag.
Element 27 resize 75% rotate right and paste under the mask layer then duplicate 2 more times and line up side by side under the mask layer.
Element 1 paste in the center of the tag.
Now add a drop shadow to all layers
*****Optional for your tube******
I was turned on to this trick by a good friend of my named Kim. You can check her out Click Here See Kim!
On your tube if you want to make it kinda pop out a little more here is something you can do.
Duplicate your tube layer on the copy layer add a gaussian blur of 2.00 and move it below the original layer. On the original layer blend mode to hard light and change the opacity to 73. Merge the layer down and sharpen!
Crop/resize tag to your preference - add copyright/license & watermark & name ..Save as PNG or JPEG
Please leave me a comment to let me know how you liked my tutorial. And plese send me your results and I will post them up! I would love to see your results! My E-mail is TimeOfYourLifeScraps@yahoo.com
Friday, February 28, 2014
Paris

by Sebrina on
Febuary 28,2014
Any resemblance to another
tutorial is purely coincidental.
Do not copy this tutorial and post it through any group or claim it as your own. Please just pass my blog for the tutorials!
For this Tutorial I'm using the art of Keith Gravey!You can purchase his tubes Here
I am using a mask from Weescotslass Creations. Thanks for the Mask! Mask WSL MASK120 and you can get it Here
Scrap kit Vintage Paris- by Amy Marie. Thank you so much! You can buy this kit at Amy Marie's Store! Here
Optional Plugins Gradient Glow.
This tutorial assumes you have a working knowledge of PSP.
Lets get started
Open a new image 600 x 600
Copy and paste paper 7 and add your mask and merge down.
Add tube so you can work around it.
Element 11 mirror and resize 50% place on the upper left of the tag.
Element 118 resize 55% and place behind the window in the upper left hand corner.
Element 107 resize 60% place in the lower right hand side of the tag.
Element 20 place on the mask layer.
Element 100 place in the upper right of the window.
Element 171 resize 65% place on the upper right of the tag and tilt to the right.
Element 125 rotate to the right and mirror and place along the bottom of the tag.
Element 166 resize 65% rotate left place just left of the clock.
Element 68 resize 60% place behind the flowers and in front of the window
Element 14 paste on the tag lower the opacity to 73% duplicate mirror and flip.
Element 134 resize 50% place lower left of flowers tilt to the right.
Now add a drop shadow to all layers
*****Optional for your tube******
I was turned on to this trick by a good friend of my named Kim. You can check her out Click Here See Kim!
On your tube if you want to make it kinda pop out a little more here is something you can do.
Duplicate your tube layer on the copy layer add a gaussian blur of 2.00 and move it below the original layer. On the original layer blend mode to hard light and change the opacity to 73. Merge the layer down and sharpen!
Crop/resize tag to your preference - add copyright/license & watermark & name ..Save as PNG or JPEG
Please leave me a comment to let me know how you liked my tutorial. And please send me your results and I will post them up! I would love to see your results! My E-mail is TimeOfYourLifeScraps@yahoo.com
Saturday, February 15, 2014
Times Past

by Sebrina on
February 14,2014
Any resemblance to another
tutorial is purely coincidental.
Do not copy this tutorial and post it through any group or claim it as your own. Please just pass my blog for the tutorials!
For this Tutorial I'm using the art of Jessica Dougherty!You can purchased her tubes Here
I am using a mask from Designs By Vaybs. Thanks for the Mask! Mask DBV Maks89 and you can get it Here
Scrap kit Times Past- by Soxsational Scraps. Thank you so much! You can get this kit at Exquisite Scraps. Here
Optional Plugins Gradient Glow.
This tutorial assumes you have a working knowledge of PSP.
Lets get started
Open a new image 600 x 600
Copy and Paper 2 and add your mask and merge down.
Add tube so you can work around it.
Times Past Word Art resize 75% paste at the bottom of the mask.
Mask resize 30% place on top of the word art layer just above the T.
Flower Doddle 2 place on the left side of tag.
Bling paste on the mask layer then duplicate and merge down.
Dove resize 30% paste on the upper left of the vine.
Flower 1 resize 50% paste upper right of tag.
Flower 2 resize 50% paste 1/2 over Flower 1 in the upper right.
Paper Heart 2 resize 50% and again at 75% and mirror Then take Paper Heart 1 resize 50% and again at 75% paste 1/2 over Paper Heart 2 and place in the middle of word art layer.
Take Rose 1 and Rose 2 resize 50% and make a small bouquet then take Bow 1 resize at 40% and place on the rose bouquet then place just above the hearts.
Boot resize 30% place on the right side just above the word art.
Now add a drop shadow to all layers
*****Optional for your tube******
I was turned on to this trick by a good friend of my named Kim. You can check her out Click Here See Kim!
On your tube if you want to make it kinda pop out a little more here is something you can do.
Duplicate your tube layer on the copy layer add a gaussian blur of 2.00 and move it below the original layer. On the original layer blend mode to hard light and change the opacity to 73. Merge the layer down and sharpen!
Crop/resize tag to your preference - add copyright/license & watermark & name ..Save as PNG or JPEG
Please leave me a comment to let me know how you liked my tutorial. And plese send me your results and I will post them up! I would love to see your results! My E-mail is TimeOfYourLifeScraps@yahoo.com
Friday, February 14, 2014
F You

by Sebrina on
February 14,2014
Any resemblance to another
tutorial is purely coincidental.
Do not copy this tutorial and post it through any group or claim it as your own. Please just pass my blog for the tutorials!
For this Tutorial I'm using the art of Zindy Neilsen!You can purchase his tubes Here
I am using a mask from Designs By Vaybs. Thanks for the Mask! Mask DBV Maks02 and you can get it Here
Scrap kit F*ck You - by Kandii Popz Dezignz. Thank you so much! You can get this kit for FREE at Scrap-A-Licious! Here
Optional Plugins Gradient Glow.
This tutorial assumes you have a working knowledge of PSP.
Lets get started
Open a new image 600 x 600
Copy and paste paper 11 and add your mask and merge down.
Add tube so you can work around it.
Glitter Stars mirror and paste.
Flame paste to the left bottom duplicate and mirror.
Star Sparkles paste on the mask tilt to the right and then duplicate and merge.
Wirefence place behind the mask layer.
Warning resize 50% place over the flames on the left.
Lips2 place at the top right of tag.
Stars paste to the top left.
Skullfly paste in the center of the tag.
Sparkles paste in the center of tag duplicate and move across the top duplicate again and move to across the bottom.
Flowers 2 resize 50% place to the right of the warning duplicate and mirror.
Flower 1 resize 50% place in the center of the flowers2.
Now add a drop shadow to all layers
*****Optional for your tube******
I was turned on to this trick by a good friend of my named Kim. You can check her out Click Here See Kim!
On your tube if you want to make it kinda pop out a little more here is something you can do.
Duplicate your tube layer on the copy layer add a gaussian blur of 2.00 and move it below the original layer. On the original layer blend mode to hard light and change the opacity to 73. Merge the layer down and sharpen!
Crop/resize tag to your preference - add copyright/license & watermark & name ..Save as PNG or JPEG
Please leave me a comment to let me know how you liked my tutorial. And plese send me your results and I will post them up! I would love to see your results! My E-mail is TimeOfYourLifeScraps@yahoo.com
Thursday, February 13, 2014
Party

by Sebrina on
March 31,2012
Any resemblance to another
tutorial is purely coincidental.
Do not copy this tutorial and post it through any group or claim it as your own.
For this Tutorial I'm using
The art of Barbara Jensen.
You purchased her tubes Here
Template #342 By Missy. Thanks so much! Here
Scrap kit Girls Girls Girls - by Freeks Creations. Thank you so much! You can buy this kit Here!
Optional Plugins Gradient Glow.
This tutorial assumes you have a working knowledge of PSP.
Lets get started
Open your template
Ctrl+D to duplicate
Delete the copyright layer.
On Small Circle Background Layer Select all float and defloat and copy and paste paper 1 on new layer then select invert and tap delete key. Unselect and delete original layer.
On Circle Layer Select all float and defloat and copy and paste paper 10 on new layer then select invert and tap delete key. Unselect and delete original layer.
On Rectangle Layer Select all float and defloat and copy and paste paper 5 on new layer then select invert and tap delete key.Unselect and delete original layer.
On Square Layer Select all float and defloat and copy and paste paper 4 on new layer then select invert and tap delete key. Unselect and delete original layer.
On Word Art Layer Gradient Glow Fat White.
On Frame Background Layer Select all float and defloat and copy and paste paper 8 on new layer then select invert and tap delete key. Unselect and delete original layer.
Now you can use elements of choice or you can use the ones I did. Please use my tag as a reference!
E38 resize 75% place on the frame backgound layer stretch to fill the layer .
E30 upsize to 125% place behind word art layer.
E 28 Place on the lower right side of tag Duplicate and mirror.
E18 resize 50% place in the center of the tag on top of the frame layer.
E19 resize 50% place in the lower left hand corner of the tag.
E1 resize 50% place in the lower left corner match up the pole to set right beside the word “The“.
E37 Place above the Chain link Layer.
E6 resize 2 times by 50% place in the top right corner of the tag.
Now add a drop shadow to all layers
*****Optional for your tube******
I was turned on to this trick by a good friend of my named Kim. You can check her out Click Here See Kim!
On your tube if you want to make it kinda pop out a little more here is something you can do.
Duplicate your tube layer on the copy layer add a gaussian blur of 2.00 and move it below the original layer. On the original layer blend mode to hard light and change the opacity to 73. Merge the layer down and sharpen!
Crop/resize tag to your preference - add copyright/license & watermark & name ..Save as PNG or JPEG
Please leave me a comment to let me know how you liked my tutorial. And plese send me your results and I will post them up! I would love to see your results! My E-mail is Timeofyourlifescraps@yahoo.com
EMO

by Sebrina on
March 31,2012
Any resemblance to another
tutorial is purely coincidental.
Do not copy this tutorial and post it through any group or claim it as your own.
For this Tutorial I'm using
The art of Jjasmine Beckett-Griffth.
I purchased her tubes when CILM but you can find her here at CDO
Template #27 By Tami. Thanks so much! Here
Scrap kit Emo Country - by Nette’s Night Owl.Thank you so much! You can buy this kit at Country Corner! Here Check out here blog Here
Optional Plugins Gradient Glow.
This tutorial assumes you have a working knowledge of PSP.
Lets get started
Open your template
Ctrl+D to duplicate
Delete the copyright layer.
On Strip Layer Select all float and defloat and copy and paste paper 3 on new layer then select invert and tap delete key. Unselect and delete original layer. Add Thin Black Gradient Glow
On Rectangle Layer Select all float and defloat and copy and paste paper 1 on new layer then select invert and tap delete key. Unselect and delete original layer. Add Thin Black Gradient Glow
On Circle Layer Select all float and defloat and copy and paste paper 10 on new layer then select invert and tap delete key.Unselect and delete original layer. Add Thin Black Gradient Glow
On Strip2 Layer Select all float and defloat and copy and paste paper 6 on new layer then select invert and tap delete key. Unselect and delete original layer. Add Thin Black Gradient Glow
On Word Art Layer Select all float and defloat and copy and paste paper 2 on new layer then select invert and tap delete key. Unselect and changed the blend mode to Darken with the opacity 65%. Merge Down Add Thin White Gradient Glow
On Stars Layer Select all float and defloat and copy and paste paper 7 on new layer then select invert and tap delete key. Unselect and delete original layer. Add Thin White Gradient Glow.
On Stars2 Layer Select all float and defloat and copy and paste paper 5 on new layer then select invert and tap delete key. Unselect and delete original layer. Add Thin White Gradient Glow
On Small Stars Layer Select all float and defloat and copy and paste paper 12 on new layer then select invert and tap delete key. Unselect and delete original layer. Add Thin Black Gradient Glow
On Text Layer Select all float and defloat and copy and paste paper 2 on new layer then select invert and tap delete key. Unselect and delete original layer. Add Thin Black Gradient Glow
Now you can use elements of choice or you can use the ones I did. Please use my tag as a reference!
SkullWhat resize 50% move to the center of the circle.
Doll resize 2 times by 50% move to set on the strip on the bottom by the L.
EMO Chain resize 50% move to “hang“ on the bottom strip Center Add Medium Gradient Glow White
Bear resize 50% and 45% set on the strip beside word art layer.
Diamond Heart resize 2 times at 50% move to the top right circle.
Now add a drop shadow to all layers
*****Optional for your tube******
I was turned on to this trick by a good friend of my named Kim. You can check her out Click Here See Kim!
On your tube if you want to make it kinda pop out a little more here is something you can do.
Duplicate your tube layer on the copy layer add a gaussian blur of 2.00 and move it below the original layer. On the original layer blend mode to hard light and change the opacity to 73. Merge the layer down and sharpen!
Crop/resize tag to your preference - add copyright/license & watermark & name ..Save as PNG or JPEG
Please leave me a comment to let me know how you liked my tutorial. And plese send me your results and I will post them up! I would love to see your results! My E-mail is Timeofyourlifescraps@yahoo.com
Black Widow

by Sebrina on
March 31,2012
Any resemblance to another
tutorial is purely coincidental.
Do not copy this tutorial and post it through any group or claim it as your own.
For this Tutorial I'm using
The Poser Out Of The Kit.
Template #58 By Tami. Thanks so much! Here
Scrap kit Black Widow - by Diva Designz.Thank you so much! You can buy this kit at Diva Designz! Here Also Check out here blog! Here
Optional Plugins Gradient Glow.
This tutorial assumes you have a working knowledge of PSP.
Lets get started
Open your template
Ctrl+D to duplicate
Delete the copyright layer and background layer.
On Raster 3 Select all float and defloat and copy and paste paper 9 on new layer then select invert and tap delete key. Unselect and delete original layer.
On Raster 5 Select all float and defloat and copy and paste paper 8 on new layer then select invert and tap delete key.Unselect and delete original layer.
On Raster 6 Select all float and defloat and copy and paste paper 3 on new layer then select invert and tap delete key. Unselect and delete original layer.
On Copy of Raster 3 Select all float and defloat and copy and paste paper 10 on new layer then select invert and tap delete key. Unselect and delete original layer.
On Raster 7 Select all float and defloat and copy and paste paper 5 on new layer then select invert and tap delete key. Change the Blend mode to color and merge down.
Now you can use elements of choice or you can use the ones I did. Please use my tag as a reference!
Skull Sconce1 resize 50% place at the bottom center add gradient glow fat white.
Skull With Roses resize 35% center over Skull Sconce1
Cross 2 resize 35% place on the left side
Candelabra resize 45% place on the right side of the tag.
Spider 2 resize 45% rotate left over the square and copy of raster layer 3
Rose 1,2,&3 resize 2 times at 50% take rose 3 turn upside down .. Take rose 2 put to the left of rose 3 duplicate and mirror and place rose 1 in the middle of the roses 2 … add a gradient glow white medium merge together and place at the top center of the tag.
Black Widow 6 place at the far left of the tag and duplicate and mirror.
Now add a drop shadow to all layers
*****Optional for your tube******
I was turned on to this trick by a good friend of my named Kim. You can check her out Click Here See Kim!
On your tube if you want to make it kinda pop out a little more here is something you can do.
Duplicate your tube layer on the copy layer add a gaussian blur of 2.00 and move it below the original layer. On the original layer blend mode to hard light and change the opacity to 73. Merge the layer down and sharpen!
Crop/resize tag to your preference - add copyright/license & watermark & name ..Save as PNG or JPEG
Please leave me a comment to let me know how you liked my tutorial. And plese send me your results and I will post them up! I would love to see your results! My E-mail is Timeofyourlifescraps@yahoo.com
Gift

by Sebrina on
March 31,2012
Any resemblance to another
tutorial is purely coincidental.
Do not copy this tutorial and post it through any group or claim it as your own.
For this Tutorial I'm using
The Poser Out Of The Kit.
Template #80 By Tami. Thanks so much! Here
Scrap kit Spring Love - by Disyas Digitals Design.Thank you so much! You can buy this kit at Country Corner! Here
Optional Plugins Gradient Glow.
This tutorial assumes you have a working knowledge of PSP.
Lets get started
Open your template
Ctrl+D to duplicate
Delete the copyright layer.
On Raster 7 Select all float and defloat and copy and paste paper 12 on new layer then select invert and tap delete key. Unselect and delete original layer.
On Text Layer Select all flood fill with black add Gradient Glow Medium White.
On Raster 3 Select all float and defloat and copy and paste paper 10 on new layer then select invert and tap delete key.Unselect and delete original layer.
On Raster 4 Select all float and defloat and copy and paste paper 8 into selection.
On Copy Of Raster 4 Select all float and defloat and copy and paste paper 4 into selection.
On Raster 8 Select all float and defloat and flood fill black.
On Raster 1 Select all float and defloat and copy and paste paper 7 on new layer then select invert and tap delete key. Unselect and delete original layer.
On Raster 9 Select all float and defloat and flood fill black.
On Raster 5 Select all float and defloat and copy and paste paper 5 on new layer then select invert and tap delete key. Unselect and delete original layer.
On Raster 6 Select all float and defloat and copy and paste paper 03 on new layer then select invert and tap delete key. Change the Blend mode to color and merge down.
Now you can use elements of choice or you can use the ones I did. Please use my tag as a reference!
Thron 5 set on top of Special.
Element 113 resize 50% place at the top center.
Element 112 35% Set on top of the A in Special .
Element 34 place in the center of the tag then duplicate and mirror .
Element 40 resize 50% and then again at 35% set on the posers lap.
Now add a drop shadow to all layers
*****Optional for your tube******
I was turned on to this trick by a good friend of my named Kim. You can check her out Click Here See Kim!
On your tube if you want to make it kinda pop out a little more here is something you can do.
Duplicate your tube layer on the copy layer add a gaussian blur of 2.00 and move it below the original layer. On the original layer blend mode to hard light and change the opacity to 73. Merge the layer down and sharpen!
Crop/resize tag to your preference - add copyright/license & watermark & name ..Save as PNG or JPEG
Please leave me a comment to let me know how you liked my tutorial. And plese send me your results and I will post them up! I would love to see your results! My E-mail is Timeofyourlifescraps@yahoo.com
Nightmare

by Sebrina on
March 31,2012
Any resemblance to another
tutorial is purely coincidental.
Do not copy this tutorial and post it through any group or claim it as your own.
For this Tutorial I'm using
The art of Jennifer Janesko.
I purchased her tubes when CILM but you can find her here at CDO
Template #16 By Tami. Thanks so much! Here
Scrap kit Bad Girls Club - by Kim's Korner. Thank you so much! You can buy this kit Here! Check out here blog Here
Optional Plugins Gradient Glow.
This tutorial assumes you have a working knowledge of PSP.
Lets get started
Open your template
Ctrl+D to duplicate
Delete the copyright layer and text layer.
On Circle Background Layer Select all float and defloat and copy and paste paper 16 on new layer then select invert and tap delete key. Unselect and delete original layer.
On Circle Frame Layer Select all float and defloat and copy and paste paper 9 on new layer then select invert and tap delete key. Unselect and delete original layer.
On Rectangle Background Layer Select all float and defloat and copy and paste paper 14 on new layer then select invert and tap delete key.Unselect and delete original layer.
On Rectangle Frame Layer Select all float and defloat and copy and paste paper 11 on new layer then select invert and tap delete key. Unselect and delete original layer.
On Rectangle Layer Select all float and defloat and copy and paste paper 22 on new layer then select invert and tap delete key. Unselect and delete original layer.
On Dotted Rectangle Layer Select all float and defloat and flood fill black.
On Rectangle Layer Select all float and defloat and copy and paste paper 25 on new layer then select invert and tap delete key. Unselect and delete original layer.
On Rectangle Layer Select all float and defloat and copy and paste paper 17 on new layer then select invert and tap delete key. Unselect and delete original layer.
On Small Circle Background Layer Select all float and defloat and copy and paste paper 02 on new layer then select invert and tap delete key. Unselect and delete original layer.
On Small Circle Frame Layer Select all float and defloat and copy and paste paper 09 on new layer then select invert and tap delete key. Unselect and delete original layer.
On Small Circle Background Layer Select all float and defloat and copy and paste paper 10 on new layer then select invert and tap delete key. Unselect and delete original layer.
On Small Circle Frame Layer Select all float and defloat and copy and paste paper 09 on new layer then select invert and tap delete key. Unselect and delete original layer.
On Word Art Layer Select all float and defloat and copy and paste paper 13 on new layer then select invert and tap delete key. Unselect and change blend mode to Hue Legacy and merge down to original word art.
Now you can use elements of choice or you can use the ones I did. Please use my tag as a reference!
Cigarette Pack resize 50% place on left hand corner on the bottom of the tag.
Handcuffs resize 50% place to make it look like it's looping thur the words How to do that is.... Place the handcuffs over the words... duplicate the handcuffs and move below word art layer.. go back to the handcuffs on top of the words and use the eraser tool to erase over the words to make it look like its looping thur the words.
Naughty Bear2 resize 50% place in the upper left corner in the circle.
Square Chain Link place over the tag.
Skull02 place in the center of the tag.
Tattoo place on the right side of the tag.
Flair01 resize 50% place in the right bottom corner.
Now add a drop shadow to all layers
*****Optional for your tube******
I was turned on to this trick by a good friend of my named Kim. You can check her out Click Here See Kim!
On your tube if you want to make it kinda pop out a little more here is something you can do.
Duplicate your tube layer on the copy layer add a gaussian blur of 2.00 and move it below the original layer. On the original layer blend mode to hard light and change the opacity to 73. Merge the layer down and sharpen!
Crop/resize tag to your preference - add copyright/license & watermark & name ..Save as PNG or JPEG
Please leave me a comment to let me know how you liked my tutorial. And please send me your results and I will post them up! I would love to see your results! My E-mail is Timeofyourlifescraps@yahoo.com
OFF!

by Sebrina Holley on
March 31,2012
Any resemblance to another
tutorial is purely coincidental.
Do not copy this tutorial and post it through any group or claim it as your own.
For this Tutorial I'm using
The art of Jessica Dougherty.
I purchased her tubes when CILM but you can find her here at CDO
Template #444 By Missy. Thanks so much! Here
Scrap kit Betrayed - by Sleek N Sassy Designs.Thank you so much! You can buy this kit Here! Check out here blog Here
Optional Plugins Gradient Glow.
This tutorial assumes you have a working knowledge of PSP.
Lets get started
Open your template
Ctrl+D to duplicate
Delete the copyright layer… the square (back bottom)… square 1... Square (top) ….. Square 2 ….
On Raster 1 Layer Select all float and defloat and copy and paste paper 7 on new layer then select invert and tap delete key. Unselect and merge original layer. Change the blend mode to hard light.
On Circle1 Layer Select all float and defloat and copy and paste paper 9 on new layer then select invert and tap delete key. Unselect and merge original layer. Lower the opacity to 4
On Circle 2 Layer Select all float and defloat and copy and paste paper 7 on new layer then select invert and tap delete key. Unselect and merge original layer. Change the blend mode to hard light.
On Dotted Square Layer Select all float and defloat and copy and paste paper 13 on new layer then select invert and tap delete key. Unselect and delete original layer.
On Copy of Dotted Square Layer Select all float and defloat and copy and paste paper 13 on new layer then select invert and tap delete key. Unselect and delete original layer.
On Square (Top Right) Layer Select all float and defloat and copy and paste paper 7 on new layer then select invert and tap delete key. Unselect and delete original layer.
On Copy of Square (Bottom) Layer Select all float and defloat and copy and paste paper 9 on new layer then select invert and tap delete key. Unselect and delete original layer.
On Rounded Edge Rectangle bottom Layer Select all float and defloat and copy and paste paper 16 on new layer then select invert and tap delete key. Unselect and delete original layer.
On Rounded Edge Rectangle top Layer Select all float and defloat and copy and paste paper 15 on new layer then select invert and tap delete key. Unselect and delete original layer.
On Thin Rectangle 3 Layer Select all float and defloat and copy and paste paper 11 on new layer then select invert and tap delete key. Unselect and delete original layer.
On Square (Big Center One) Layer Select all float and defloat and copy and paste paper 14 on new layer then select invert and tap delete key. Unselect and delete original layer.
On Rectangle Layer Select all float and defloat and copy and paste paper 3 on new layer then select invert and tap delete key. Unselect and delete original layer.
Now you can use elements of choice or you can use the ones I did. Please use my tag as a reference!
Caught button 40% rotate slight to the right
Move the top square below the bottom squares.
Zipped heart resize 85% move between the squares
Mug resize 35% place to the right of the tag where the handles id off the template & erase the handle.
Marriage Certificate resize 50% move to the right of the heart and rotate to the right and move behind the heart.
Flower 2 resize 35% put at the top left corner of tag.
Now add a drop shadow to all layers
*****Optional for your tube******
I was turned on to this trick by a good friend of my named Kim. You can check her out Click Here See Kim!
On your tube if you want to make it kinda pop out a little more here is something you can do.
Duplicate your tube layer on the copy layer add a gaussian blur of 2.00 and move it below the original layer. On the original layer blend mode to hard light and change the opacity to 73. Merge the layer down and sharpen!
Crop/resize tag to your preference - add copyright/license & watermark & name ..Save as PNG or JPEG
Please leave me a comment to let me know how you liked my tutorial. And plese send me your results and I will post them up! I would love to see your results! My E-mail is Timeofyourlifescraps@yahoo.com
USA

by Sebrina on
March 18,2009
Any resemblance to another
tutorial is purely coincidental.
Do not copy this tutorial and post it through any group or claim it as your own.
For this Tutorial I'm using
The art of Ted Hammond.
I purchased his tubes when CILM but you can find him here at CDO
Template #403 By Missy. Thanks so much! Here
Scrap kit Courtsey of the Red White and Blue - by Sleek N Sassy Designs.Thank you so much! You can buy this kit Here! Check out here blog Here
Optional Plugins Gradient Glow.
This tutorial assumes you have a working knowledge of PSP.
Lets get started
Open your template
Ctrl+D to duplicate
Delete the copyright layer & Dotted Line 1 & 2.
On Copy of Circle 3 Layer Select all float and defloat and copy and paste paper 6 on new layer then select invert and tap delete key. Unselect and delete original layer.
On Square Layer Select all float and defloat and copy and paste paper 14 on new layer then select invert and tap delete key. Unselect and delete original layer.
On Rectangle 1 Layer Select all float and defloat and copy and paste paper 10 on new layer then select invert and tap delete key. Unselect and delete original layer.
On Rectangle 2 Layer Select all float and defloat and copy and paste paper 5 on new layer then select invert and tap delete key. Unselect and delete original layer.
On Stars Layer Select all float and defloat and flood fill with red and unselect it.
On Circle 3 Layer Select all float and defloat and copy and paste paper 12 on new layer then select invert and tap delete key. Unselect and delete original layer.
On Circle 1 Layer Select all float and defloat and copy and paste paper 9 on new layer then select invert and tap delete key. Unselect and delete original layer.
On Thin Rectangle 1 Layer Select all float and defloat and copy and paste paper 13 on new layer then select invert and tap delete key. Unselect and delete original layer.
On Thin Rectangle 2 Layer Select all float and defloat and copy and paste paper 8 on new layer then select invert and tap delete key. Unselect and delete original layer.
On Thin Rectangle 3 Layer Select all float and defloat and copy and paste paper 11 on new layer then select invert and tap delete key. Unselect and delete original layer.
On Circle 2 Layer Select all float and defloat and copy and paste paper 2 into selection then unselect it.
On Frame Back Layer Select all float and defloat and copy and paste paper 1 into selection then unselect it.
Now you can use elements of choice or you can use the ones I did. Please use my tag as a reference!
Embellishment paste in the far left hand corner of tag
I took a close up of my tube and on the Frame selection select all float and defloat then paste the close up of the tube into selection then select none.
Fireworks paste as a new layer and move them just to the right of the frame
Red Sliver Star resize 35% move to the bottom right of the tag
Blue Sliver Star resize 35% move to the left just under frame
White Star resize 35% move to the right between and slightly upwards of the star between the frame and the other star.
Now add a drop shadow to all layers
*****Optional for your tube******
I was turned on to this trick by a good friend of my named Kim. You can check her out Click Here See Kim!
On your tube if you want to make it kinda pop out a little more here is something you can do.
Duplicate your tube layer on the copy layer add a gaussian blur of 2.00 and move it below the original layer. On the original layer blend mode to hard light and change the opacity to 73. Merge the layer down and sharpen!
Crop/resize tag to your preference - add copyright/license & watermark & name ..Save as PNG or JPEG
Please leave me a comment to let me know how you liked my tutorial. And please send me your results and I will post them up! I would love to see your results! My E-mail is Timeofyourlifescraps@yahoo.com
Gothic Bite

by Sebrina on
March 15,2009
Any resemblance to another
tutorial is purely coincidental.
Do not copy this tutorial and post it through any group or claim it as your own.
For this Tutorial I'm using
The art of Rachael Huntington.
I purchased her tubes when CILM was still in business I have looked and can’t find where she is selling now if she is even selling at all. If I find the info out about her I will post the correction. Thanks
Template #164 By Tami. Thanks so much! Here
Scrap kit is the freebie add on to Seduce Me - by Kim‘s Korner.Thank you so much! Check out here blog! Here She has the freebie on her blog!
Optional Plugins Gradient Glow.
This tutorial assumes you have a working knowledge of PSP.
Lets get started
Open your template
Ctrl+D to duplicate
Delete the copyright layer Raster 12 14 & 15.
On Raster Layer 4 Select all float and defloat and copy and paste paper 1 paste into selection. Then unselect all.
On Raster Layer 5 Select all float and defloat and copy and paste paper 1 paste into selection. Then unselect all.
On Raster Layer Select all float and defloat and copy and paste paper 3 paste into selection. Then unselect all.
On Raster Layer 7 Select all float and defloat and copy and paste paper 1 paste into selection. Then unselect all.
On Raster Layer 2 Select all float and defloat and copy and paste paper 3 paste into selection. Then unselect all.
On Raster Layer 3 Select all float and defloat and copy and paste paper 1 paste into selection. Then unselect all.
On Raster Layer 13 Shadow 1 Add Gradient Glow Fat White
Rasters 8 9 & 10 leave them the way they are.
Now you can use elements of choice or you can use the ones I did. Please use my tag as a reference!
Lips resize 2 times 1st is 75% 2nd is 65% place in the middle of the tag you should be able to paste as a new layer and where it puts it is where I put mine… I pulled the side just a little out to make it touch each side of the box they are sitting on
Button 2 resize 50% place over raster 10 free rotate till the S barely shows
Word Art rotate to the left Free rotate to right to make it look slanted and place in to top left hand corner of the tag.
Now add a drop shadow to all layers
*****Optional for your tube******
I was turned on to this trick by a good friend of my named Kim. You can check her out Click Here See Kim!
On your tube if you want to make it kinda pop out a little more here is something you can do.
Duplicate your tube layer on the copy layer add a gaussian blur of 2.00 and move it below the original layer. On the original layer blend mode to hard light and change the opacity to 73. Merge the layer down and sharpen!
Crop/resize tag to your preference - add copyright/license & watermark & name ..Save as PNG or JPEG
Please leave me a comment to let me know how you liked my tutorial. And plese send me your results and I will post them up! I would love to see your results! My E-mail is Timeofyourlifescraps@yahoo.com
Subscribe to:
Posts (Atom)
Grab My Blinkie